The Story
Product Features:
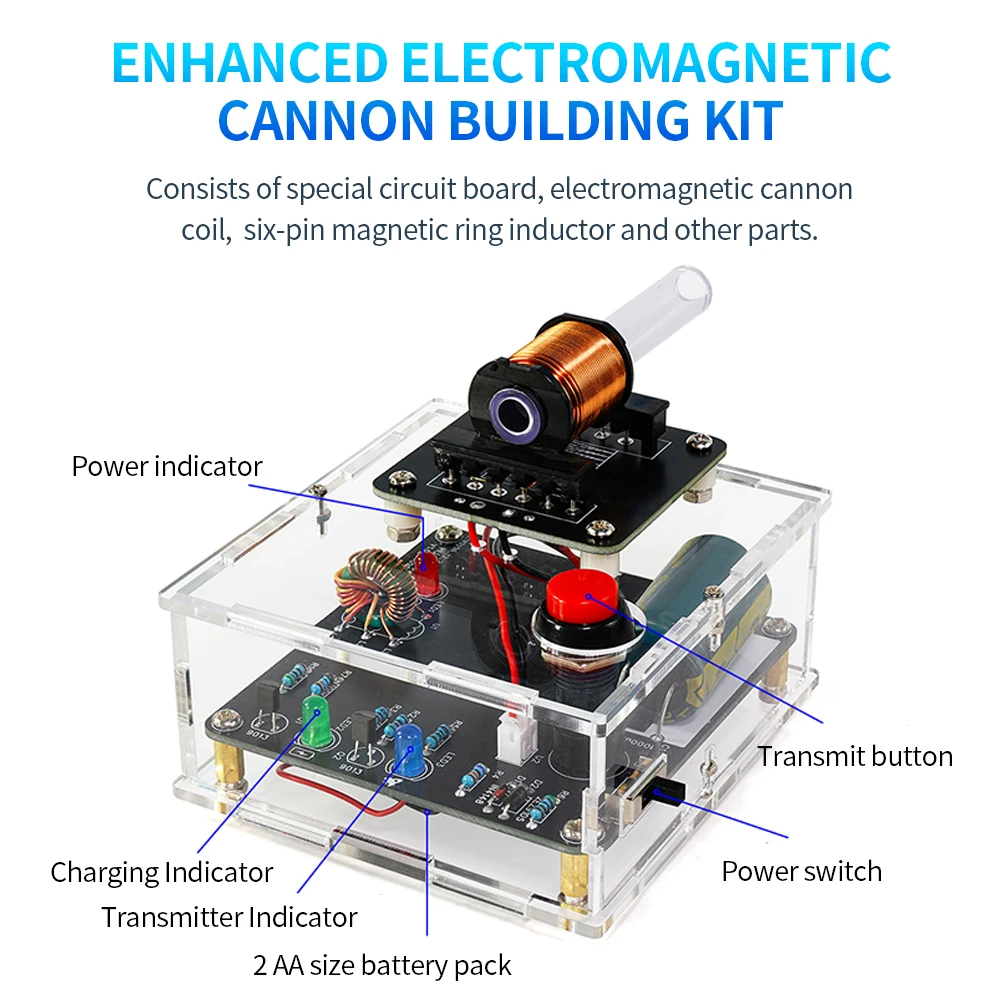
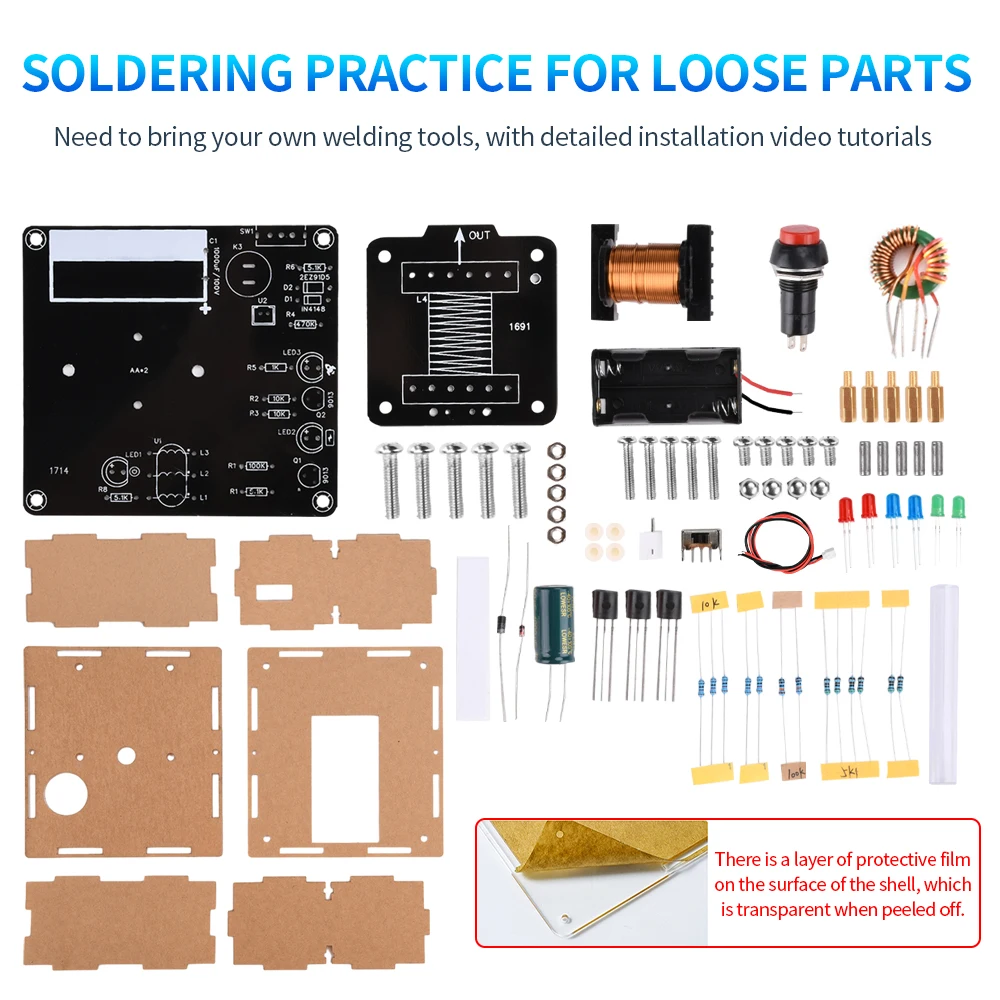
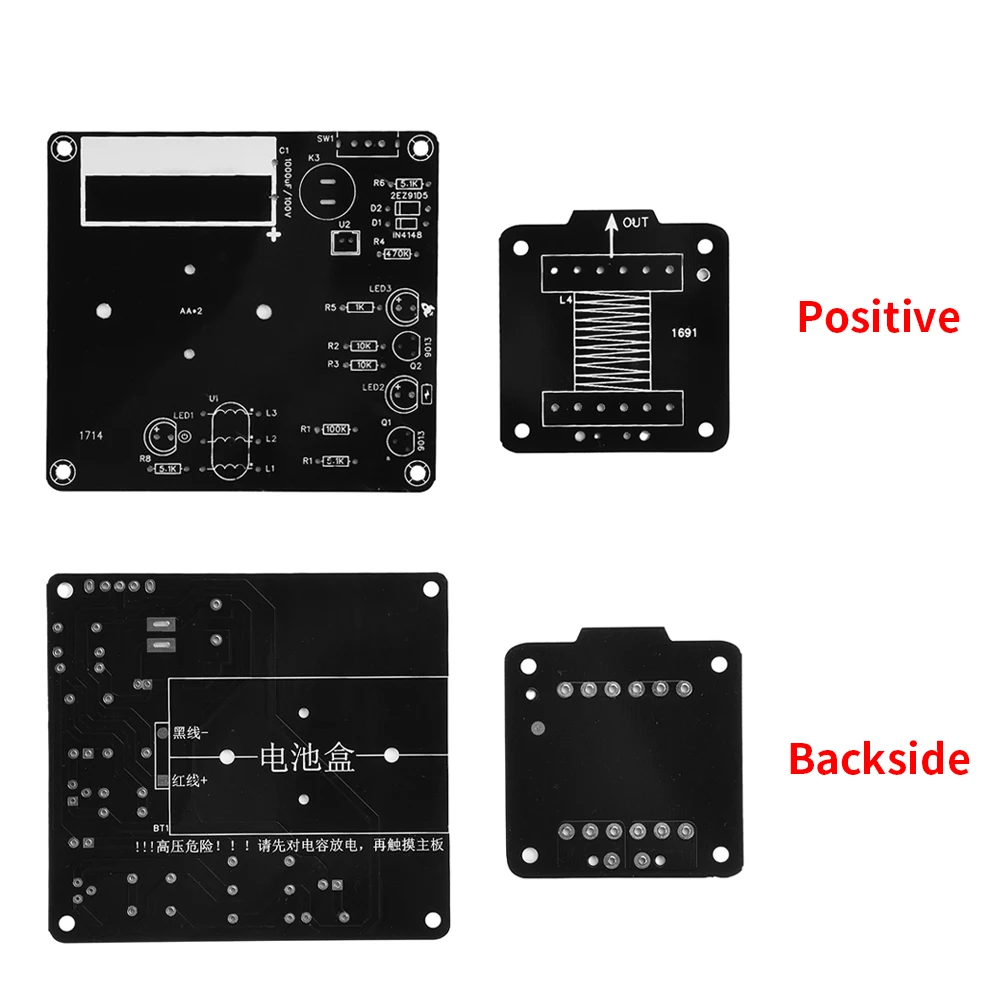
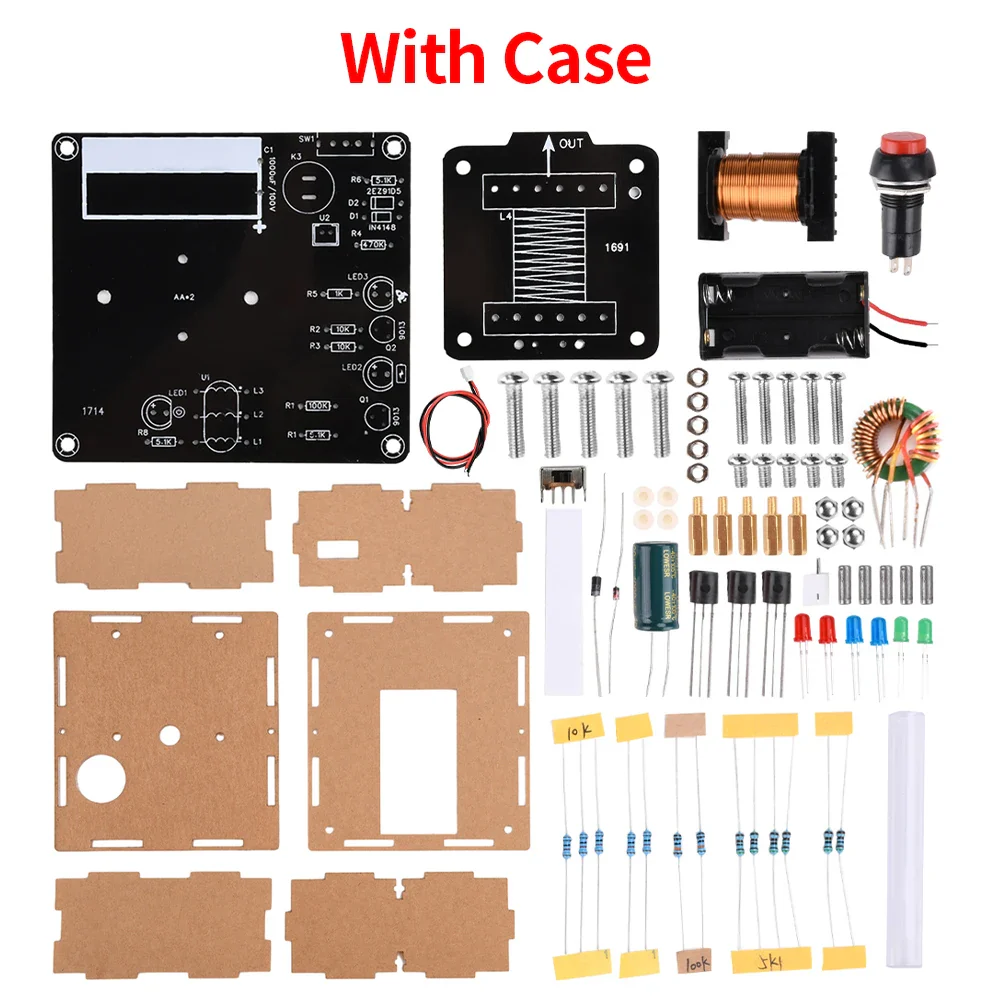
1. Comprises dedicated circuit boards, electromagnetic cannon coils, six-pin ferrite core inductors and other components.
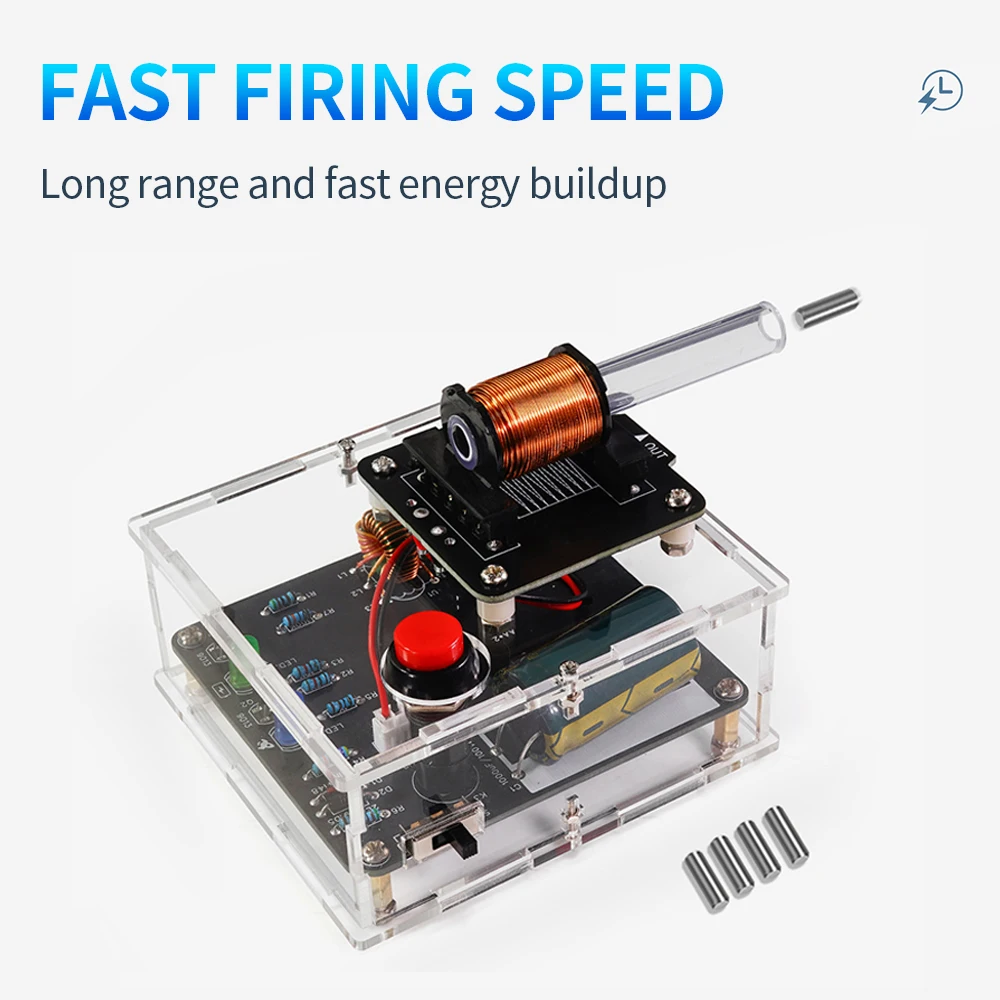
2. Rapid projectile launch velocity.
3. Swift energy accumulation.
4. Extended projectile range.
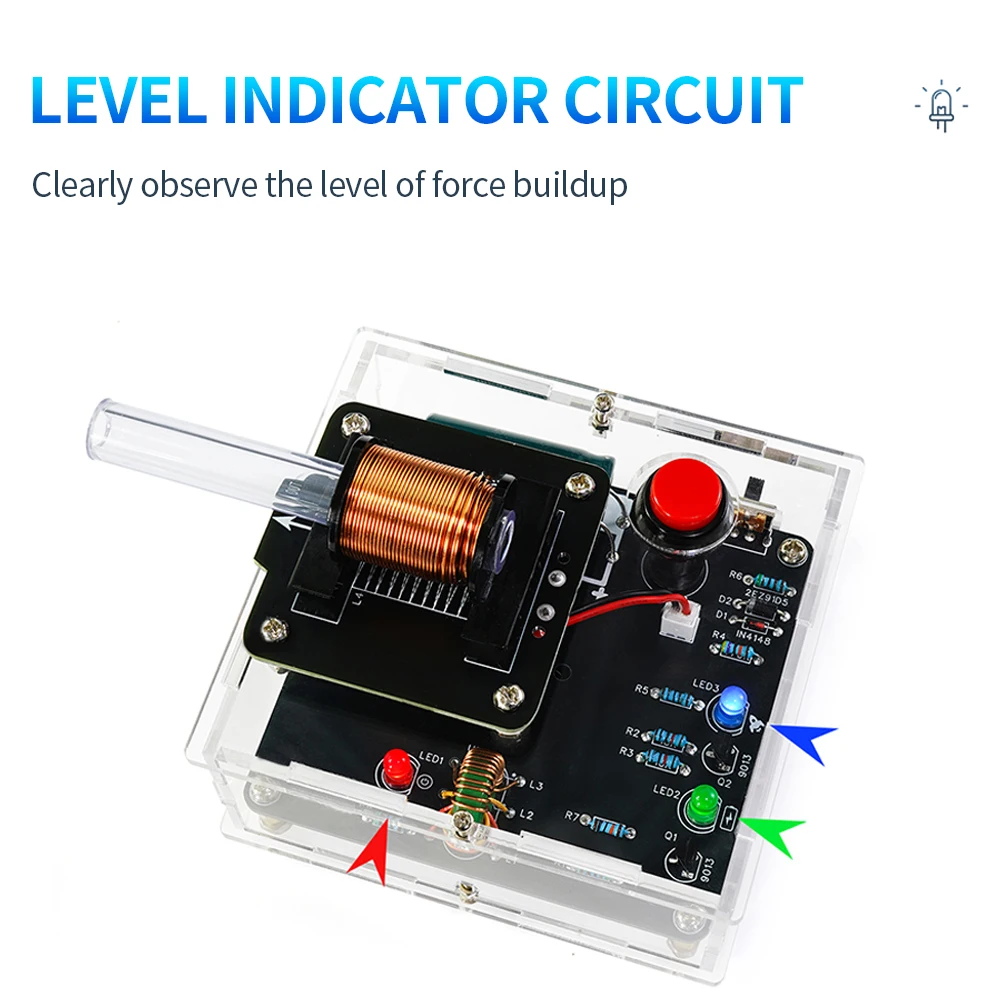
5. Power level indicator circuit facilitates convenient monitoring of charge status.
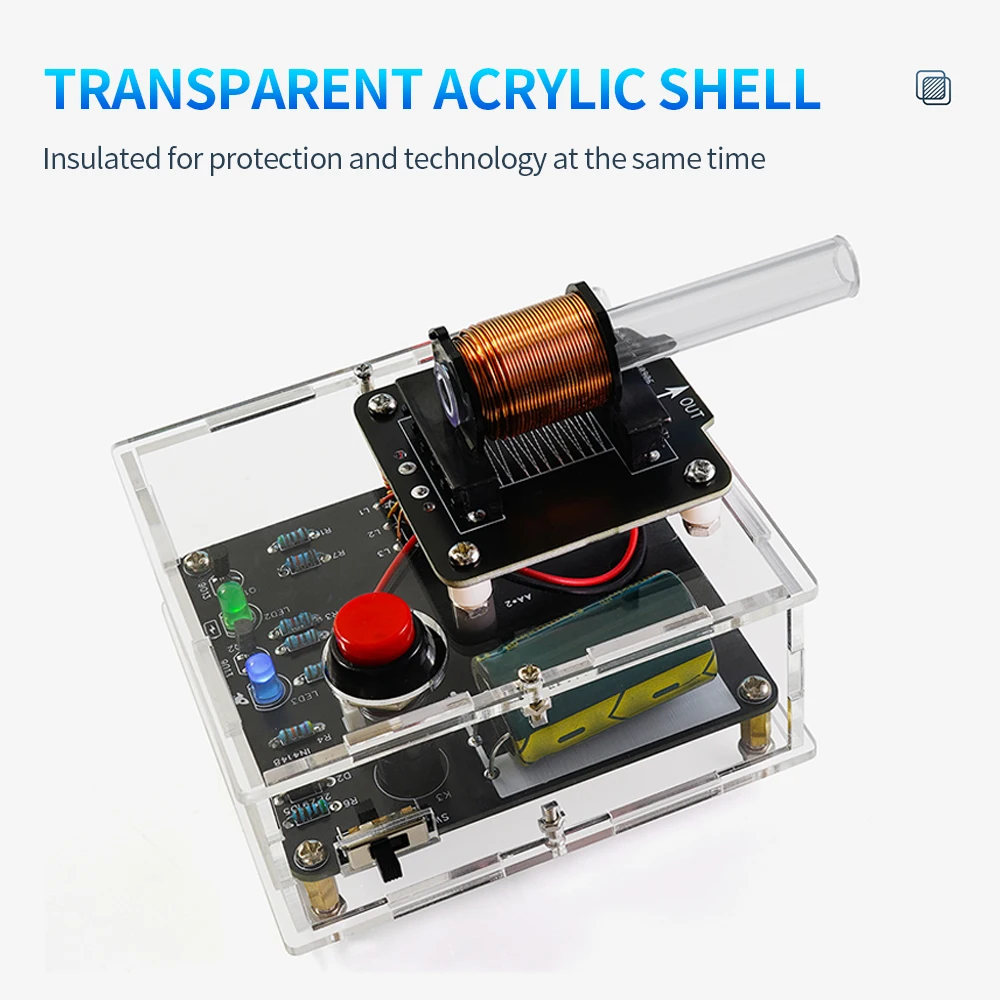
6. Optional acrylic casing for insulating protection.
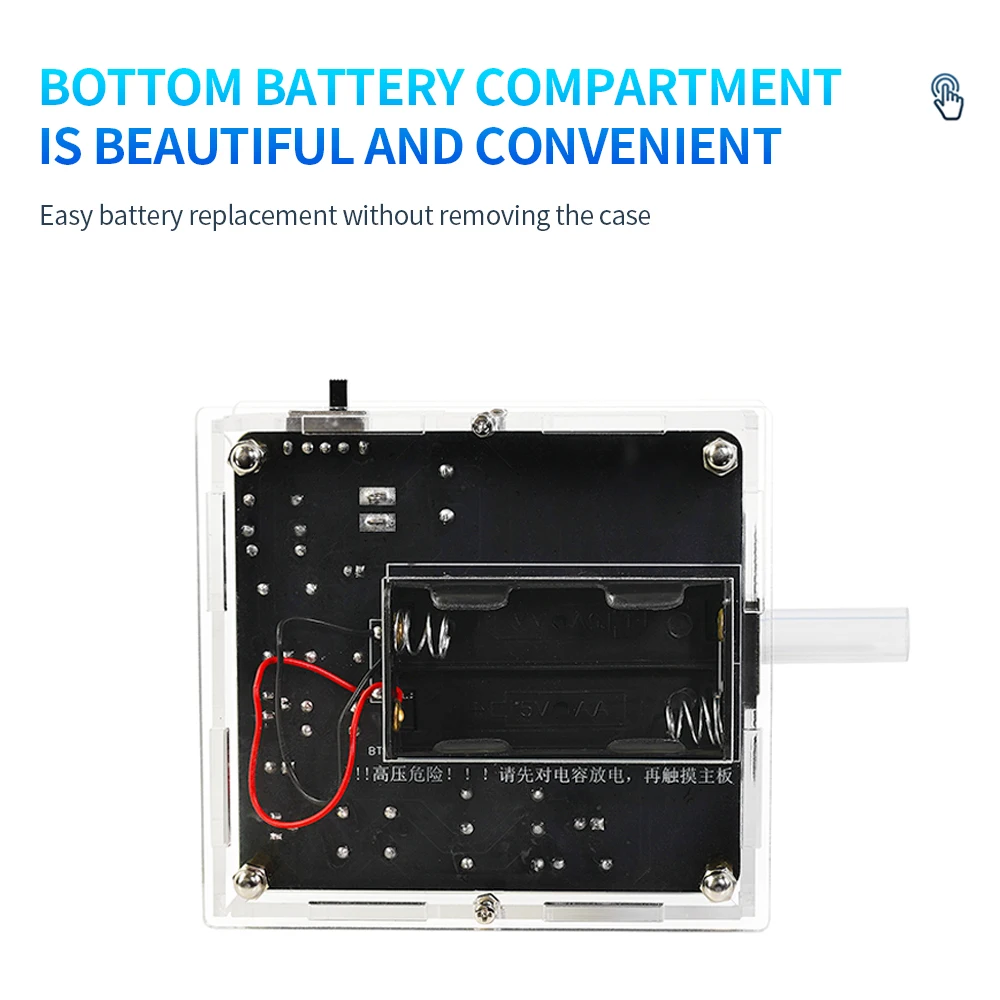
7. Aesthetically pleasing and convenient bottom battery compartment allows effortless battery replacement without disassembling the casing.
Product Description:
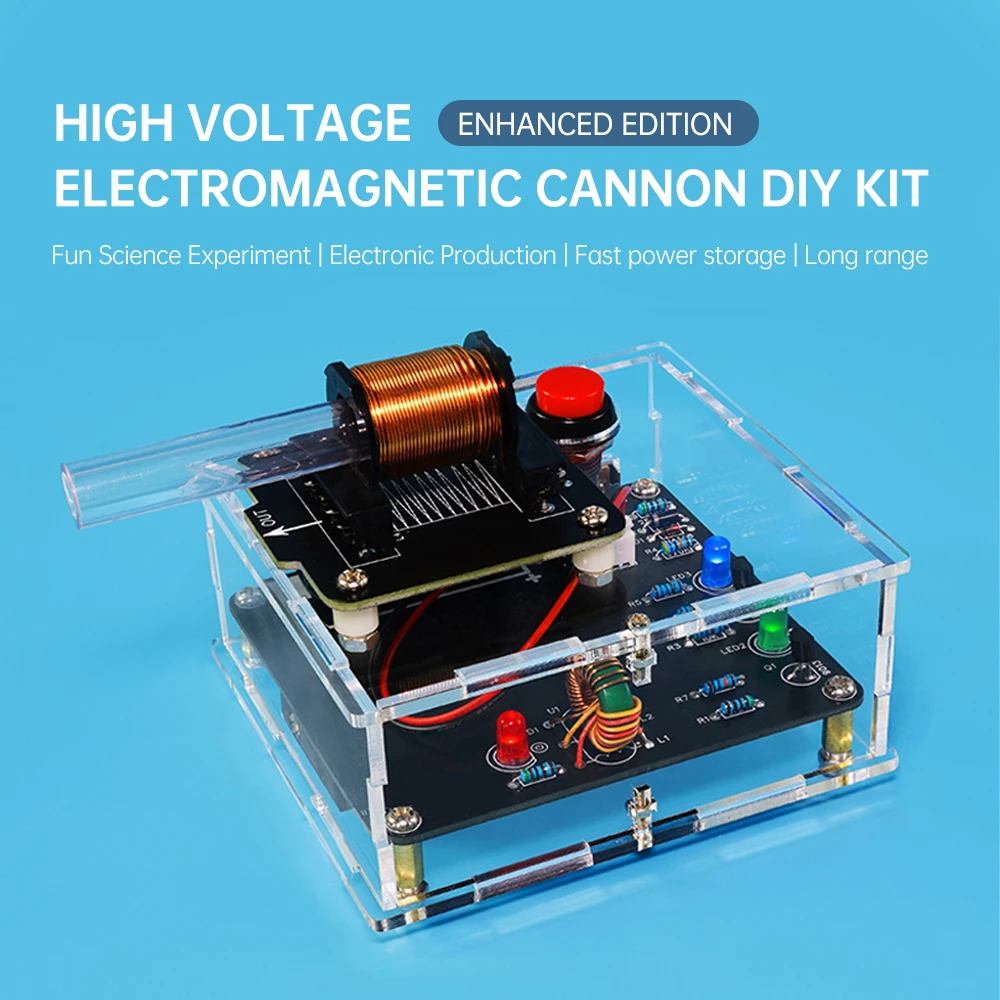
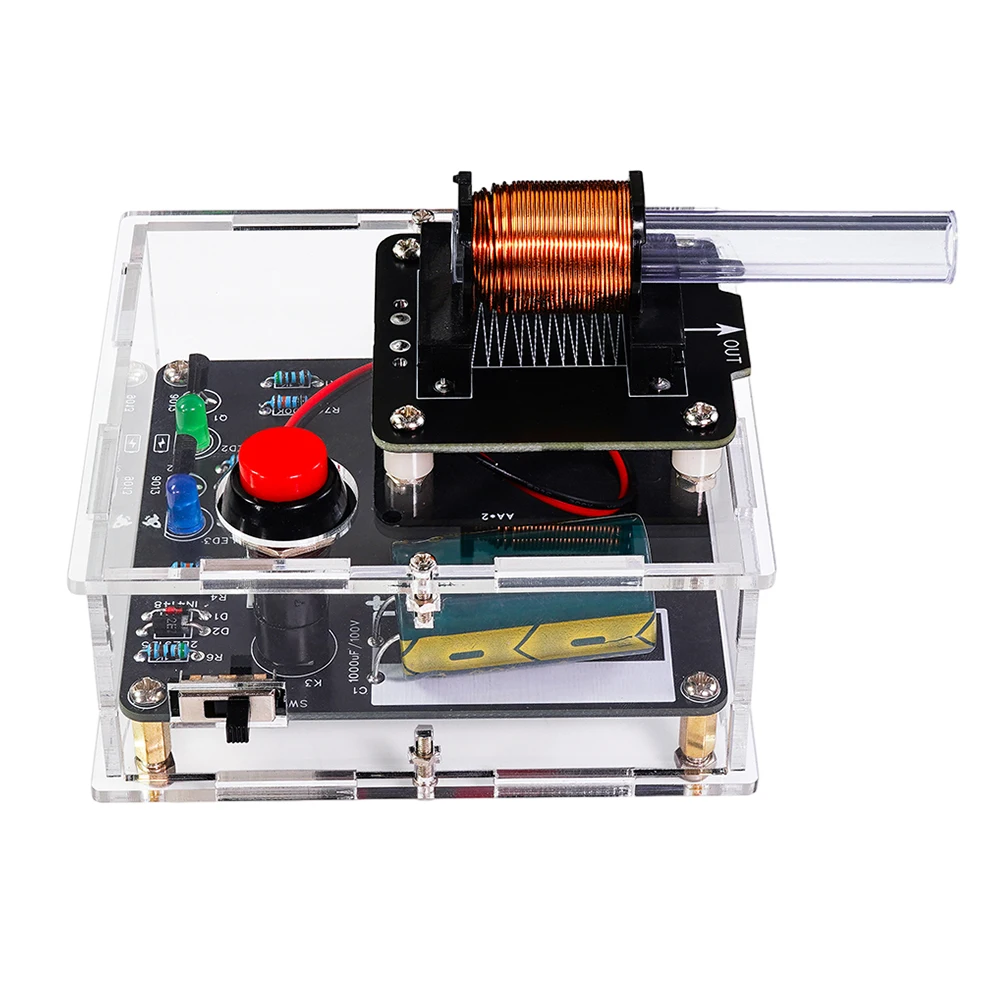
An electromagnetic cannon is a weapon technology that accelerates projectiles using electromagnetic force. It employs electromagnetic pulses to accelerate projectiles to high velocities before firing them at great speed. Our Enhanced Electromagnetic Cannon Kit simplifies wiring complexity, significantly reducing soldering difficulty to make it more accessible for beginners. It incorporates power, charging, and firing indicator lights for clearer operational status monitoring. Caution: Never aim at persons or fragile objects during use to prevent projectile hazards!
Product Specifications:
Kit Name: Enhanced Electromagnetic Cannon Construction Kit
Operating Voltage: DC 3V
Power Supply: 2 x AA batteries, DC 3V (batteries not included)
Charging Current: 50–65mA
Firing Current: 70–80mA
PCB Dimensions: 85x78mm + 50x53mm (hand-measured, ±1–2mm tolerance)
Operating Instructions:
1. Engage the power switch (toggle switch SW1). The red and green LEDs will illuminate.
2. Wait approximately 10–30 seconds. The blue LED will illuminate; the brighter the blue light, the greater the firing range.
3. Insert the projectile into the rear of the barrel.
4. Press the firing button (circular button K3). The projectile will be expelled from the barrel, completing the firing sequence.
Key Electromagnetic Cannon Technologies:
Power System: Supplies high-voltage electricity to generate potent electromagnetic forces. Common configurations include capacitors or battery packs.
Electromagnetic Accelerator: An electromagnetic device accelerating projectiles, comprising coils and supports. When energised, the coils generate intense magnetic fields acting upon the projectile to accelerate it.
Product Listing:
1x DIY Kit (Optional: With/Without Enclosure)
***Safety Advisory***
Never direct the device towards persons or fragile objects during operation to prevent hazardous projectile discharge!
This project operates under high voltage; do not touch metal components when powered on!
Precautions:
1. Internal operating voltage may reach 90–100V, exceeding the international safety standard of 36V. Never touch internal electronic components while powered, as this may cause electric shock.
2. External components like coils have thin insulation. Avoid abrasion that could cause damage and leakage. Switching points are also vulnerable; if exposed, the risk is heightened in versions without casing. Exercise caution.
3. Self-assembled circuit boards may inevitably contain errors or faults. If the boost circuit section functions normally, the energy storage capacitor (1000uF/100V) may have charged to a high voltage, creating an electrocution hazard. Therefore, before troubleshooting or handling the unit, first measure the voltage across the capacitor terminals using a multimeter. Alternatively, discharge the capacitor by gripping a plastic-insulated wire (with both ends stripped to expose copper strands) and touching both capacitor terminals with the exposed copper ends. Once the charge is fully discharged, the capacitor voltage will drop to 0V, after which it is safe to proceed.

Details & Craftsmanship
Every detail has been carefully considered to bring you the perfect product.

Details & Craftsmanship
Every detail has been carefully considered to bring you the perfect product.

Details & Craftsmanship
Every detail has been carefully considered to bring you the perfect product.

Details & Craftsmanship
Every detail has been carefully considered to bring you the perfect product.

Details & Craftsmanship
Every detail has been carefully considered to bring you the perfect product.

Details & Craftsmanship
Every detail has been carefully considered to bring you the perfect product.
Details & Craftsmanship
Every detail has been carefully considered to bring you the perfect product.
Description
Product Features:
1. Comprises dedicated circuit boards, electromagnetic cannon coils, six-pin ferrite core inductors and other components.
2. Rapid projectile launch velocity.
3. Swift energy accumulation.
4. Extended projectile range.
5. Power level indicator circuit facilitates convenient monitoring of charge status.
6. Optional acrylic casing for insulating protection.
7. Aesthetically pleasing and convenient bottom battery compartment allows effortless battery replacement without disassembling the casing.
Product Description:
An electromagnetic cannon is a weapon technology that accelerates projectiles using electromagnetic force. It employs electromagnetic pulses to accelerate projectiles to high velocities before firing them at great speed. Our Enhanced Electromagnetic Cannon Kit simplifies wiring complexity, significantly reducing soldering difficulty to make it more accessible for beginners. It incorporates power, charging, and firing indicator lights for clearer operational status monitoring. Caution: Never aim at persons or fragile objects during use to prevent projectile hazards!
Product Specifications:
Kit Name: Enhanced Electromagnetic Cannon Construction Kit
Operating Voltage: DC 3V
Power Supply: 2 x AA batteries, DC 3V (batteries not included)
Charging Current: 50–65mA
Firing Current: 70–80mA
PCB Dimensions: 85x78mm + 50x53mm (hand-measured, ±1–2mm tolerance)
Operating Instructions:
1. Engage the power switch (toggle switch SW1). The red and green LEDs will illuminate.
2. Wait approximately 10–30 seconds. The blue LED will illuminate; the brighter the blue light, the greater the firing range.
3. Insert the projectile into the rear of the barrel.
4. Press the firing button (circular button K3). The projectile will be expelled from the barrel, completing the firing sequence.
Key Electromagnetic Cannon Technologies:
Power System: Supplies high-voltage electricity to generate potent electromagnetic forces. Common configurations include capacitors or battery packs.
Electromagnetic Accelerator: An electromagnetic device accelerating projectiles, comprising coils and supports. When energised, the coils generate intense magnetic fields acting upon the projectile to accelerate it.
Product Listing:
1x DIY Kit (Optional: With/Without Enclosure)
***Safety Advisory***
Never direct the device towards persons or fragile objects during operation to prevent hazardous projectile discharge!
This project operates under high voltage; do not touch metal components when powered on!
Precautions:
1. Internal operating voltage may reach 90–100V, exceeding the international safety standard of 36V. Never touch internal electronic components while powered, as this may cause electric shock.
2. External components like coils have thin insulation. Avoid abrasion that could cause damage and leakage. Switching points are also vulnerable; if exposed, the risk is heightened in versions without casing. Exercise caution.
3. Self-assembled circuit boards may inevitably contain errors or faults. If the boost circuit section functions normally, the energy storage capacitor (1000uF/100V) may have charged to a high voltage, creating an electrocution hazard. Therefore, before troubleshooting or handling the unit, first measure the voltage across the capacitor terminals using a multimeter. Alternatively, discharge the capacitor by gripping a plastic-insulated wire (with both ends stripped to expose copper strands) and touching both capacitor terminals with the exposed copper ends. Once the charge is fully discharged, the capacitor voltage will drop to 0V, after which it is safe to proceed.